

Pressurizing a vehicle’s cooling circuit to 16 PSI while cold isolates hairline plastic fractures, weeping water pump gaskets, and leaking heater core seams without running the engine. A 15-minute static hold reveals hidden pressure drops, preventing unnecessary radiator replacements and protecting aluminum cylinder heads from severe thermal warpage during extreme Tucson summer heat.
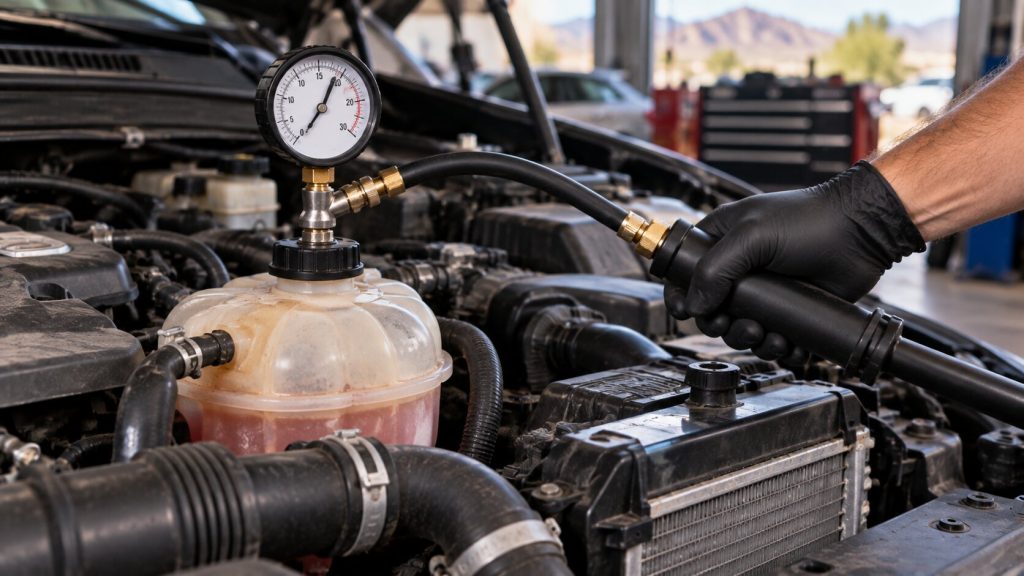
A vehicle came in losing a quart of coolant every week. The owner was told elsewhere they needed a full radiator replacement. I hooked up a Stant pressure adapter to the expansion tank, pumped the circuit to 16 PSI, and held it. Within four minutes, the needle dropped 3 PSI—not from a cracked core, but from a hairline fracture on the upper plastic hose flange. A quick hose replacement in the bay solved what looked like a major system failure.
What Happens During a Cooling System Pressure Test
When I perform a cooling system pressure test, I connect a specialized hand pump and calibrated pressure gauge directly to your radiator filler neck or coolant expansion tank. I pressurize the closed circuit to the vehicle’s exact OEM specification—typically between 12 and 16 PSI, matching the rating stamped on your radiator cap.
During this 15-minute static test, I monitor the gauge needle for any pressure decay:
- 0 PSI Drop: The primary cooling circuit, hoses, and aluminum core are structurally sealed.
- 1–3 PSI Drop (External): Fluid or air is escaping under force, highlighting weeping water pump seals, aged hose clamps, or brittle thermostat housings.
- 1–3 PSI Drop (Internal): Pressure bleeds off without a single drop hitting the shop floor, indicating an internal failure like a blown head gasket or a leaking heater core.
How 105°F Tucson Heat Degrades Cooling Components
Tucson’s summer ambient temperatures routinely push engine bay operating conditions to thermal extremes. Constant thermal cycling—heating up during a stop-and-go commute on I-10 and cooling down overnight—accelerates plasticizer leaching in OEM plastic radiator end tanks.
When plastic crimps contract against aluminum core bodies, hairline stress fractures form along the seams. These micro-cracks often remain sealed when the engine is cold, only spraying coolant under full operating pressure during steep highway climbs up Mount Lemmon.
Radiator vs Alternate Failure Sources
| Symptom / Observation | Likely Failure Source | How a Cooling System Pressure Test Confirms It |
| Coolant pooling near front bumper | Loose lower hose clamp or hairline hose split | Static 16 PSI push forces fluid directly through the seam without thermal interference. |
| Sweet smell inside cabin / faint window mist | Leaking heater core or heater hose connector | Circuit loses pressure continuously while the engine bay remains completely dry. |
| Pressure decay with zero external dampness | Blown head gasket or cracked cylinder head | Applied air pressure bleeds directly into combustion chambers or oil passages. |
| Overheating strictly during traffic idling | Failed radiator cap pressure release valve | Bench-testing the cap shows spring fatigue failing to hold rated 14 PSI. |
Diagnostic Steps for Pinpointing Pressure Decay
- Cold Visual & Static Inspection: Confirm the engine is completely cold. Inspect the expansion tank, check belt tension, and trace dried white-green coolant crust around hose unions.
- Apply OEM Test Pressure: Fasten the correct adapter block to the expansion tank. Pump the circuit up to OEM specification (12 to 16 PSI) and monitor the gauge needle over a 15-minute dwell window.
- Trace Pressure Decay: If the gauge drops more than 0.5 PSI, scan all hose connections, water pump weep holes, and crimped end-tank seams using high-intensity inspection lighting.
- Isolate the Radiator Cap: Thread the cap onto a standalone testing block and pressurize it independently. A fatigued spring that vents below its stamped threshold allows 50/50 glycol to boil off into the overflow tank prematurely.
Protecting Your Engine from Severe Thermal Warpage
Operating a vehicle with a minor pressure leak lowers the boiling point of your coolant mixture. At high elevations near Mount Lemmon, lower atmospheric pressure combined with a depressurized cooling loop causes localized boiling inside cylinder head water jackets.
This localized cavitation creates air pockets that prevent heat transfer, warping aluminum cylinder heads and burning head gaskets within minutes of high-load driving. Catching a leak early with a cooling system pressure test costs a fraction of an engine rebuild.
Diagnostic Testing at Campbell Avenue
If your low coolant light illuminates after idling on Arapahoe or Campbell Avenue, avoid throwing guesswork parts at the problem. Stop by my shop, Accurate Service Auto Repair, at 843 S Campbell Ave, Tucson, AZ 85719 for a cold static pressure hold test, or book an evaluation online with me to isolate your leak before replacing healthy components.
Frequently Asked Questions
How long does a cooling system pressure test take?
A cooling system pressure test takes 30 to 45 minutes to perform thoroughly. This timeframe includes attaching the engine-specific adapter, running a 15-minute static pressure hold to detect slow decay, and bench-testing the radiator cap valve independently.
Can a cooling system leak pressure without leaking fluid externally?
Yes. A cooling system can lose pressure internally without leaving fluid on your driveway. Internal pressure loss occurs when coolant bleeds through a blown head gasket into the combustion chamber or leaks through an internal heater core matrix where the fluid evaporates before reaching the pavement.
Should I replace my radiator cap when replacing hoses?
Yes. Replacing your radiator cap alongside new hoses ensures system pressure remains stable. Radiator cap relief springs weaken over thermal cycles, and a fatigued cap will vent system pressure prematurely even if every hose and clamp in the engine bay is brand new.
What pressure should a cooling system hold during a test?
A cooling system should hold the exact PSI stamped on your OEM radiator cap, typically between 12 and 16 PSI. I never exceed this rated limit during testing in my bay to prevent damaging heater cores or tearing healthy rubber hose liners.
